01/01/2025
DIY LVP Flooring Installation: A Step-by-Step Guide for Beginners
Are you considering installing Luxury Vinyl Plank (LVP) flooring in your home? With its durability, water resistance, and stylish appearance, LVP has become a popular choice for West Virginia homeowners. While professional installation is always an option, many DIY enthusiasts find LVP installation to be a manageable project. In this guide, we'll walk you through the basic process of installing LVP flooring yourself.
Preparation: The Key to Success
Before you start laying planks, proper preparation is crucial:
Acclimate Your Flooring: Let your LVP sit in the room where it will be installed for at least 48 hours. This allows the material to adjust to the temperature and humidity of your space.
Gather Your Tools: You'll need a utility knife, tape measure, spacers, tapping block, pull bar, and a saw for cutting planks to fit.
Prepare the Subfloor: Ensure your subfloor is clean, dry, and level. Any imperfections can show through your new flooring.
Planning Your Layout
Take time to plan before you start installing:
Measure your room carefully, accounting for closets and other nooks.
Decide which direction you want your planks to run. Generally, planks look best when installed parallel to the longest wall or in the same direction as the main light source.
Plan for obstacles like doorways, built-ins, and transitions to other flooring types.
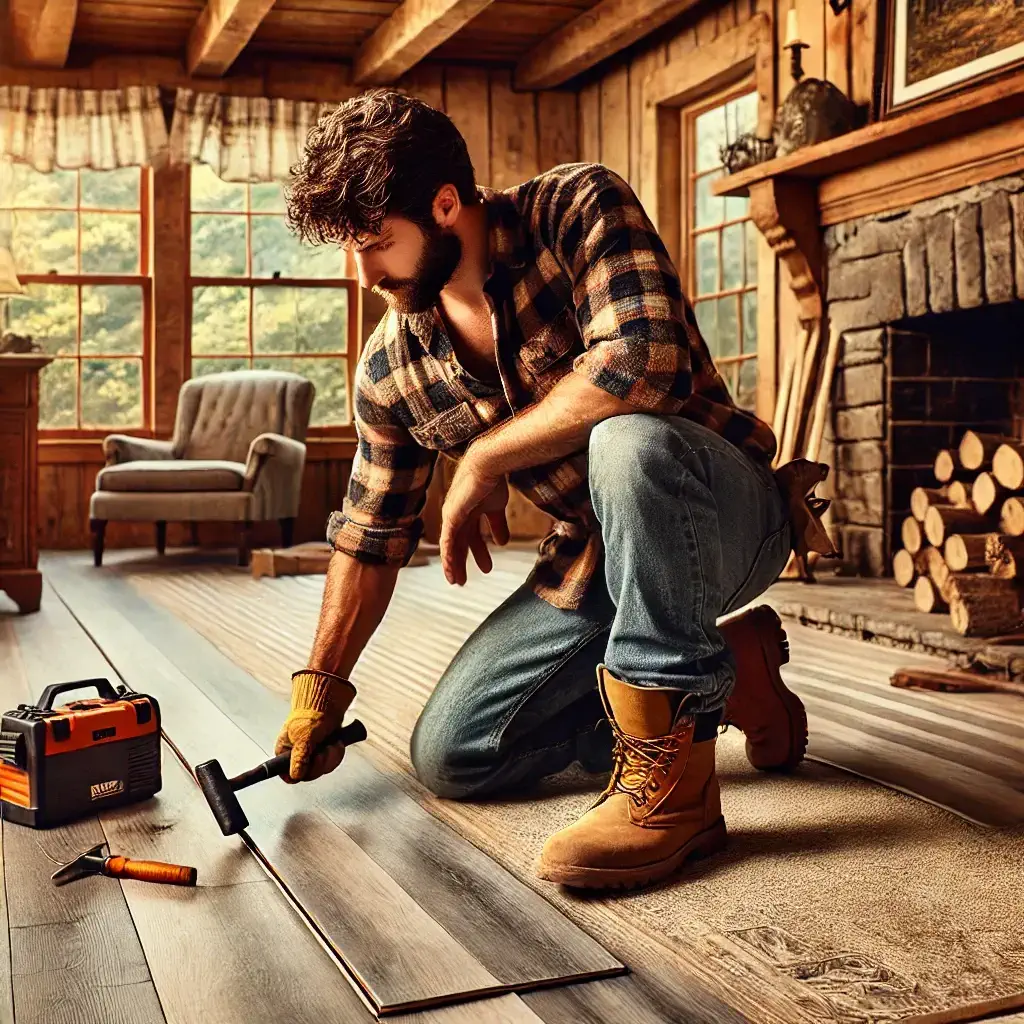
The Installation Process
Now for the main event - installing your LVP flooring:
Start Your First Row: Begin in a corner, using spacers to maintain a small gap between the planks and the wall. This gap allows for expansion and will be covered by baseboards later.
Continue Installation: As you lay planks, use a tapping block to ensure tight seams between planks. Stagger the end joints of your planks for a natural look.
Cutting Planks: Use a utility knife and straight edge to score and snap planks for a straight cut. For more intricate cuts around obstacles, you may need a jigsaw.
The Last Row: You'll likely need to cut the last row of planks lengthwise to fit. Use a pull bar to tightly fit these last pieces.
Finishing Touches
Once all planks are in place:
Install trim and molding to cover the expansion gaps you left around the edges of the room.
Use transition strips where your new LVP flooring meets other flooring types.
Post-Installation Care
After installation:
Wait 24 hours before moving furniture back into the room.
Follow manufacturer guidelines for initial cleaning and ongoing maintenance to keep your new floor looking great.
While DIY installation can be rewarding, it's important to follow manufacturer instructions carefully and be aware of local building codes. If you're unsure about any step in the process, don't hesitate to consult a professional. We can recommend experienced local contractors who can ensure your LVP flooring is installed perfectly.
At Discount Building Supply WV, we're here to support your DIY projects. We offer a wide selection of LVP flooring options, as well as many other building supply items. Our team is always happy to provide advice and answer any questions you might have about your flooring project.
Ready to start your LVP flooring project? Visit us in Princeton, WV, or give us a call at 304-913-4034. Let's make your flooring dreams a reality!